WINGOVATIONS

PARTS AND ADVICE FOR YOUR 'OLDEN GOLDIE'

An online source dedicated to Honda's amazing four cylinder Goldwings!
One of the constant queries that comes up time after time on the various GoldWing Forums is the question of the starter clutch intermittent operation or failure.
The symptoms range from an occasional non-engagement to a complete failure to turn the engine over at all, accompanied by the frantic whirring of the starter motor!
The clutch itself, built into the generator rotor, consists of three rollers which, at rest, are pushed down by spring loaded guide pins onto a finish-ground journal which is part of the driven starter sprocket. Due to the angle that the guide pins sit at, this locks the rotor to the driven sprocket until the engine starts, which resulting in the rotor turning faster than the sprocket and thus releasing the locking effect.
The problems are caused by the positioning of the starter clutch high up in the engine, buried inside the back of the alternator rotor. Next to no lubrication can get to it as there is no direct feed of oil, only what gets splashed up; and due to it's position it is a prime target for the acidic condensate when the engine cools. The resulting rust and deposited gunge makes the guide pins stick so that the rollers are unable to contact the sprocket with sufficient force to drive the rotor shaft (and thence the crankshaft) or sometimes the rollers stick and stop rotating, causing a flat to be worn down in one spot.
The driven sprocket can also have the needle roller bearing and oilways totally choked up and the surface the clutch rollers act on gets rusty.
Some owners have said that an oil change with some ATF in the oil will free it off, for a while at least, but for a number of reasons I would not advocate going that route. The proper answer is to strip it down and fix it properly.
Having to push start or bump start a fully laden 1200 Aspencade or Interstate is not funny!
(Those of you with an early GL1000 with a kickstart can stop laughing now.)
Unfortunately this is an 'engine out' job. There is no way to get the rear casing off with it in the frame on any of the models. So may I suggest that while you are into the rear of the engine, you should check the clutch plates for wear, both the starter and oil pump chains, and the scavenge pump. (see the essential modification to the scavenge pump here)
I will assume that you have a workshop manual to help you remove the engine.
With the engine out, remove the rear clutch cover and rear engine casings to expose the alternator rotor. The OEM cross-head screws are JIS, not standard Phillips. Failing the correct screwdriver or bit, an appropriate sized Phillips can have the point ground down until you get the best fit. The original screws are made of cream cheese and almost certainly will need to be replaced.
You will find there is are three holes in the outer diameter of the rotor. Insert a bar or drift to hold the rotor from turning and undo the double headed bolt holding it to the shaft. You could also hold it with a strap wrench. The rotor should then pull off the shaft but it may be extremely tight on its splines and require a puller to get it off.
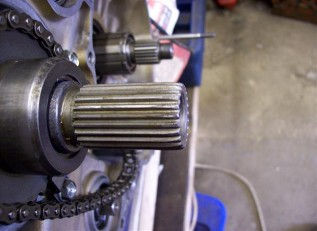
With the rotor removed, the driven sprocket is exposed. It comes off together with the starter chain and starter sprocket. Wash the needle roller bearing out and clear the oil holes. If the bearing is rough it should be changed (the circlips holding it in are a PITA to get out! I opened up a small groove with the Dremel so that it could be levered out. I greased the bearing with moly grease before putting it back but I don't know how long the grease would stay there). The OEM bearing is totally unobtainable, but it can be replaced by two K28 x 33 x 13 bearings which are available off the shelf.
Clean and polish the sprocket roller driving surface with fine Emery cloth.
Now turn your attention to the back of the rotor. Inside the back you will see three rollers and three guide pins with springs inside them. Remove and wash them, then check the rollers for flats. If no flats, they can be re-used but to be honest, since the repair kits are so cheap and since I would not want to have to do the job again, I always replace the
Clean out the shaped clutch housing. I don't recommend trying to remove the whole clutch from the rotor. It is usually a tight fit and it's very possible to damage it.
If you do try to remove it, be warned! The three screws holding it in are very, very tight! (Check what happened to
Insert body text here ...
WinGovations Copyright 2010
J G Evans
1975 1976 1977 1978 1979 1980 GoldWing 1981 1982 1983 1984 1985 1986 1987


